@.         
                @@         
          :     :@         
          .@     @         
           :@    @+        
            +@   @@        
        `@@@;'@` +@        
       '@@'+@@@@; @        
               @@@@'       
                +@@@.      
                 `@@@+     
       :@@:@.     :@@@     
        .@@@@:     @       
          @#@@@    @:      
          .@ '@@@  @@      
           ;@  #@@@`.      
            @+  @@@@@      
             @   +@@@@:    
        @@@@@@.    +@@@+   
        @@.@@@        .    
         @,                
         `@                
          +@               
        #@@;               
       :@:@@@              
       .@ #+#@             
       `@  @ @+            
        @'  @ @            
        :@  :@@            
         @@  #;            
          @:               
           @:              
                .          
                @+         
        ;:      `@         
       +@@@      ::        
        #@@@'     @        
         :@@@@    :;       
          `@@@@:   @       
           .@@@@#  @`      
             @;@@@`+@      
              @ @@@@@      
               @ '@@#      
                @  ;       
                 @         
         @@@:    :@        
        @@@@@@:   ##       
        +  :@@@@.  @`      
         @   :@@@@ ;@      
         +@    ;@@@@@      
          @#     #@@@      
           @       +.      
        @@@@@              
       @@@@@@+             
       @   ;@@             
       #,   ;@+            
        @`   @@            
        :@# @+@            
         .@@@:`            
                           
           :               
         . #;              
        @@@@@              
       @.`#@@@             
       @    @@.            
       :#    @@            
        @#   @@            
         @@@@##            
          @@@              


       .@@@@@#`            
       @+:;;@@@@:          
       ;@ @ @@ @@@`        
        @@@@ @@` @@#       
         ;@@  :@; :@@`     
          @+    @@  @@+    
          #@     `@+ .@#   
           @:      .@#:@;  
            @         :@   


Popular Posts

Recently I was encountered with the Bresenham's Line Drawing Algorithm. If you want to know more about it Google is your friend and here is a nice Proof that I found. It has four different condition and with little variation. So instead of writing four functions for 4 different Slopes, here I wrote one function that works for all. The trick is to pass the parameters according to the slopes and use the same function instead of using 4 different function.Here is the code in OpenGl.
#include <GL/glut.h>
#include <iostream>
using namespace std;
int a, b, c, d, flag;
void init() {
glClearColor(0.0f, 0.0f, 0.0f, 0.0f);
glMatrixMode(GL_PROJECTION);
gluOrtho2D(-160.0, 160.0, -160.0, 160.0);
}

void PutPixel(int x, int y) {
    glColor3f(1.0f, 0.0, 0.0);
    glBegin(GL_POINTS);
    if(flag)
    glVertex2i(y,x);
    else
    glVertex2i(x, y);
    glEnd();
}
//The Generalized Function, sweet ans Short.
//First three parameters only required, rest if made global need not be passed.
void bresenhamGen(int x, int y, int p, int dx, int dy, int limit, int xinc, int yinc) {
    if(limit < 0) {
        return;
    }
    PutPixel(x, y);
    if(p < 0)
        bresenhamGen(x + xinc, y, p + 2*dy, dx, dy, limit - 1, xinc, yinc);
    else {
        bresenhamGen(x + xinc, y + yinc, p + (2*dy - 2*dx), dx, dy, limit - 1, xinc, yinc);
    }
}
//checking the slope ans calling the function accordingly.
void bresenham(int x1 , int y1, int x2, int y2) {
    if(x1 > x2) {
        swap(x1, x2);swap(y1, y2);
    }
    int dx, dy;
    dx = x2 - x1;
    dy = y2 - y1;
    float m = (float)dy/dx;
    if(m > 0 && m < 1) {
        flag = 0;
        bresenhamGen(x1, y1, 2*dy - dx, dx, dy, x2 - x1, 1, 1);
    }
    else if(m >= 1) {
        flag = 1;
        bresenhamGen(y1, x1, 2*dx - dy, dy, dx, y2-y1, 1, 1);
    }
    else if(m < -1.0) {
        flag = 1;
        bresenhamGen(y1, x1, 2*dx + dy, -1*dy, dx, y1 - y2, -1, 1);
    }
    else if(m >= - 1) {
        flag = 0;
        bresenhamGen(x1, y1, -2*dy - dx, dx, -1*dy, x2 - x1, 1, -1);
    }
}
void display() {
    glClear(GL_COLOR_BUFFER_BIT);
    bresenham(a, b, c, d);
    glFlush();
}

int main(int argc, char **argv) {
    cin>>a>>b>>c>>d;
    glutInit(&argc, argv);          
    glutCreateWindow("Bresenham");  
    glutInitWindowSize(320, 320);   
    glutInitWindowPosition(100, 100); 
    glutDisplayFunc(display);
    init(); 
    glutMainLoop();
    return 0;
}

Continue Reading
Sublime Text Compile/ Build and Run Codes

I recently started with Sublime Text Editor, it's an amazing text editor with elegance and beauty. This editor has some of the most advanced features I have seen so far. For people who are using notepad++ this is a good alternative to choose from.

When I started I was little confused as to how to compile and Run codes with this editor.Here is a walk through.

Compiling/ Building  

I shall take java as an example rest languages can be configured similarly

  • First open a new File and save it with a proper name say "Test.java"
  • Open command Prompt and type javac to check if the java compiler path is correctly set.Type java at cmd and check if the command is recognizable.If any error comes set the Path environment variable for Java first.
  • Then Goto Tools>Build System and check the Automatic or JavaC option.
  • Then Press ctrl+B to build the console will display Finished in [time ] message.
  • Now to Run you can either goto the directory containing the compiles file and open cmd there and type 
  • "java Test" to run or proceed to next step and learn how to setup a Build system to Run from sublime text.

Running The Compiled File / Making the New Build System


  • Sublime uses its build-system files of corresponding languages to build the source code.So we can either make a new build system or edit the already exiting one.
  • To make a new build system goto Tools>Build System>New Build System. Then Type the new Build System commands.
  • But as I am using java here for which sublime text already has the build system, I prefer editing the current one , usually the file is located at 
  • C:\Users\{username}\AppData\Roaming\Sublime Text 2\Packages\Java\JavaC.sublime-build
  • Open the file JavaC.sublime-build in sublime text and them add the below code snippet

{
"cmd": ["javac", "$file"],
"file_regex": "^(...*?):([0-9]*):?([0-9]*)",
"selector": "source.java",
"variants": [

        { "cmd": ["javac", "-Xlint", "$file"],
          "file_regex": "^(...*?):([0-9]*):?([0-9]*)",
          "selector": "source.java",
          "name": "Java Lintter"
        },  

        { "cmd": ["java", "$file_base_name"],
          "name": "Run Java"
        }
    ]

}

Over here we are just adding two variant to the build system the default being the first one. The Last one with the name "Run Java" is the one that is gonna Run the compiled file. So that it Runs it is necessary that the file name and the class name in the source name with the main (taking about java here) should be same or else it wont find the file.

Save the file and then now to compile the code you need to press ctrl+b  but to Run you just need to type ctrl+shift+p and then there type "Run java". That's it. The output will be displayed in the sublime text console.

Continue Reading

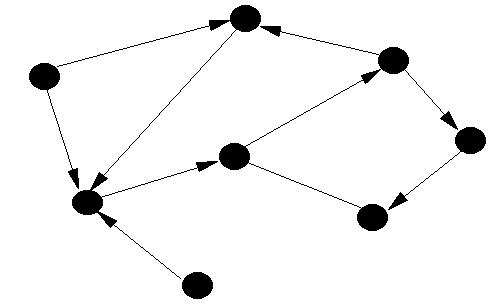
Graph are one of the most interesting topic to be discussed, but many who begin get confused as to how to implement it. There are many way to implement a graph here is one of the simplest implementation. Where the no. of vertex and the info about the edge is taken as an input.
#include<iostream>
#include<string>
#include<vector>
using namespace std;
struct Edge
{
 int destination;
 int weight;
};
void printGraph(vector< vector<Edge> > v){
 for(int i=0;i<v.size(); i++){
// same thing can also be done using iterator;
  cout<<i<<": ";
  for(int j=0;j<v[i].size();j++)
   cout<<v[i][j].destination<<" ";
 }
}
Edge getEdge(int dest, int weight=0){
 Edge e;
 e.destination = dest;
 e.weight = weight;
 return e;
}
int main(){
 vector< vector<Edge> > g;

        // destination of each vertex here max is choosen as 20;
 int dest[20];

 int n;//number of vertex;
 cout<<"Enter the no of vertex\n";
 cin>>n;
 for(int i=0;i<n;i++){
  cin.sync();
  cout<<"Enter no of edges";
  int ne;
  cin>>ne;
  cout<<"Enter all the destination";
  for(int j=0;j<ne;j++)
   cin>>dest[j]; 

// enter all  destination in one line here 1 2 3 4 etc.
  vector<Edge> temp;
  for(int j=0;j<ne;j++){

                        // weight is kept at zero, can be passed here.
   Edge e = getEdge(dest[j]);
   temp.push_back(e);

  }
  g.push_back(temp);
  temp.clear();
 }
 printGraph(g);
 return 0;

}
The graph in the above is directed graph so if an undirected graph is made one should keep in mind about adding the symmetric edge too. Here The weight is given a default value of zero if one wants to assign weight to different edge , with the destination also pass the weight of the edge. This is an implementation using vector, map or list can also be used according too the need.
Continue Reading

Taking inputs, yes you must be knowing them already but here is a little hack that i really liked. Usually in competitive coding the input format is predefined and then there are time when you have to take input of multiple value in the same line for example.

1 2 3 4 5 6 6 7 9

if this is to be stored in an array of type int but the user enters all the values in single line then this can be done.
if we want to enter 10 number in the array, then :

int x[10];
for(int i=0;i<10;i++)
     cin>>x[i];

Now when prompted for input enter all the values in one line, thats it. 
a second solution is using the istringstream, if you already have a string like "1 2 3" then this can be done.

int n;
string s="1 2 3 4 5 6 7 8 9";
int a[9];
int i=0;
istringstream st(s);
while(st>>n){
a[i]=n;
i++;
}
// and a will have iall the element in specified position.
Continue Reading
Windows 8  Ad Hoc Using Command Prompt With Batch File

Windows 8 Does not allow to make Ad Hoc network , And the new update to it windows 8.1 doesn't even allow to connect to and Ad-Hoc network. The reasons are still not clear, but even this is not completely true. Windows 8 just removed the front end GUI to make the Ad-Hoc. Using CMD that can be done. The netsh command does this trick well,The command is something like this:

netsh wlan set hostednetwork mode=allow ssid=<network name> key=<password 8 char>
netsh wlan start hostednetwork

Here is a picture showing how to check if Hoatstednetwork is supported or not.

But typing these lines is painful and yes most of are lazy. So I thought of Making a batch file that Will some what automate this feature with little bit of user intraction in with the user can choose the Network name and password. Below goes the code for the Batch file that Present with a Menu that can Start, Stop the ad-hoc.
Ps: The Network created wont be visible on you laptop but other friends can see it and connect, If in the first attempt the network is not visible try first stoping the Ad-Hoc by Pressing 2 the second option in the Menu.


Copy the below code to a text file and save it as "adhoc.bat" remember to run it as Administrator 

Continue Reading
Understanding the 'this' keyword in Javascript .


Understanding this took me quite some time and the way I learn is by reading source code and then interpreting what I get from them.I write so that I don't forget it later on. This Post I will try to explain how the awesome keyword 'this' works in javascript as it has different meaning at different places.
Before starting I would like you to remember the key rule :
'this' always refers to the owner.
So,here are instances that Prove the above line.This is different is different circumstance.

Below are different situations in which this can be used ..

Continue Reading
Beginning With ubuntu 12.04 after having Windows for years

I have always heard this "Linux is awesome", never made a strong comment for or against because I was a Windows user . Recently i switched to Ubuntu completely. Its been a week or so and so far i have liked it . Even before Reading whats next ask yourself few questions that will make it clear whether to install Ubuntu or not
1.Do you have an active internet connection ?
2.Are you more into development than gaming?
3.Did you answer yes for the above two question ?

Now if you answer for the third question is yes then you are ready for the change and read on or else there is this red cross near the top corner press it.

So you are decided and want to install Ubuntu but then,will you still need Windows. 

Continue Reading
Django 'Unresolved import' Error of Pydev in Ubuntu Fix

Recently I switched from Windows to Ubuntu and being a beginner I had to face a few problems setting up everything . For writing Django apps I use Aptana IDE that in turn uses the Pydev plugin. I downloaded the tar ball from aptana official site .Installed Django using the terminal. Extracted Aptana tar ball in home directory and Ran it by double clicking on 'AptanaStudio3'. Everything looked nice until I imported a django app in the workspace . All the Djano import when marked as error and they could not be resolved . There was nothing wrong with the Python path variable and when running the Project from the terminal everything worked .The Problem was with Aptana/Eclipse that it could not resolve the path. I found the reason after some time and this is how i solved it .

The problem:


Continue Reading